|
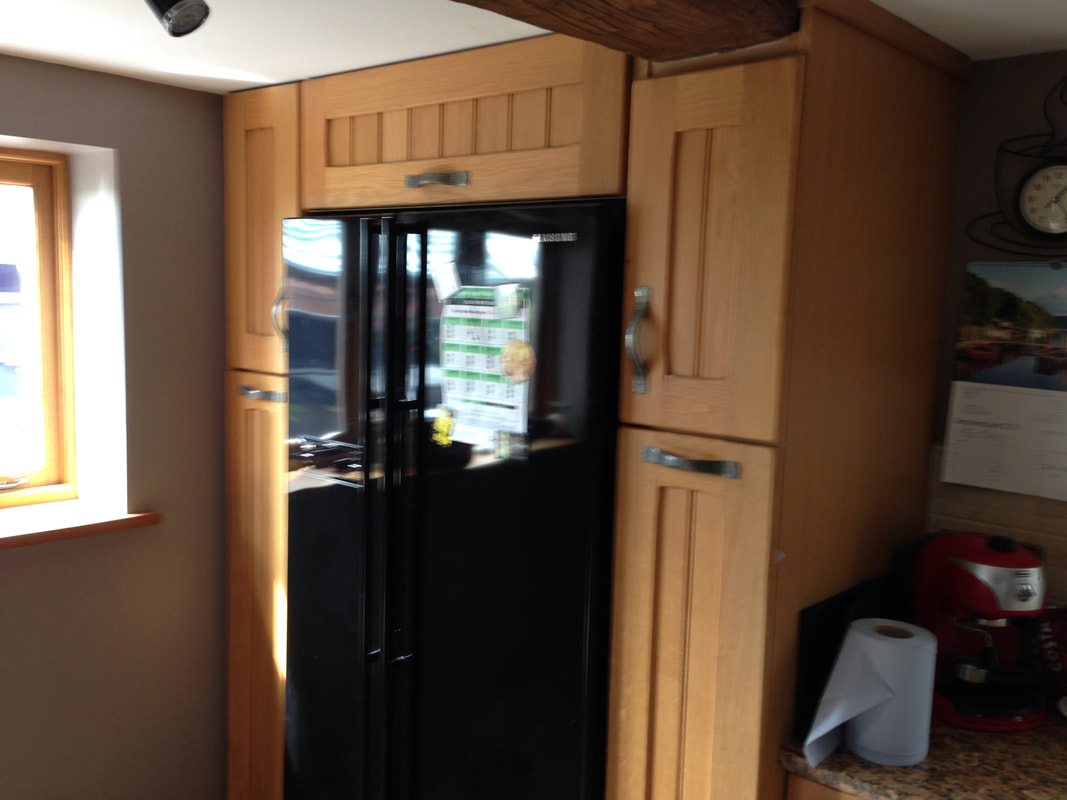
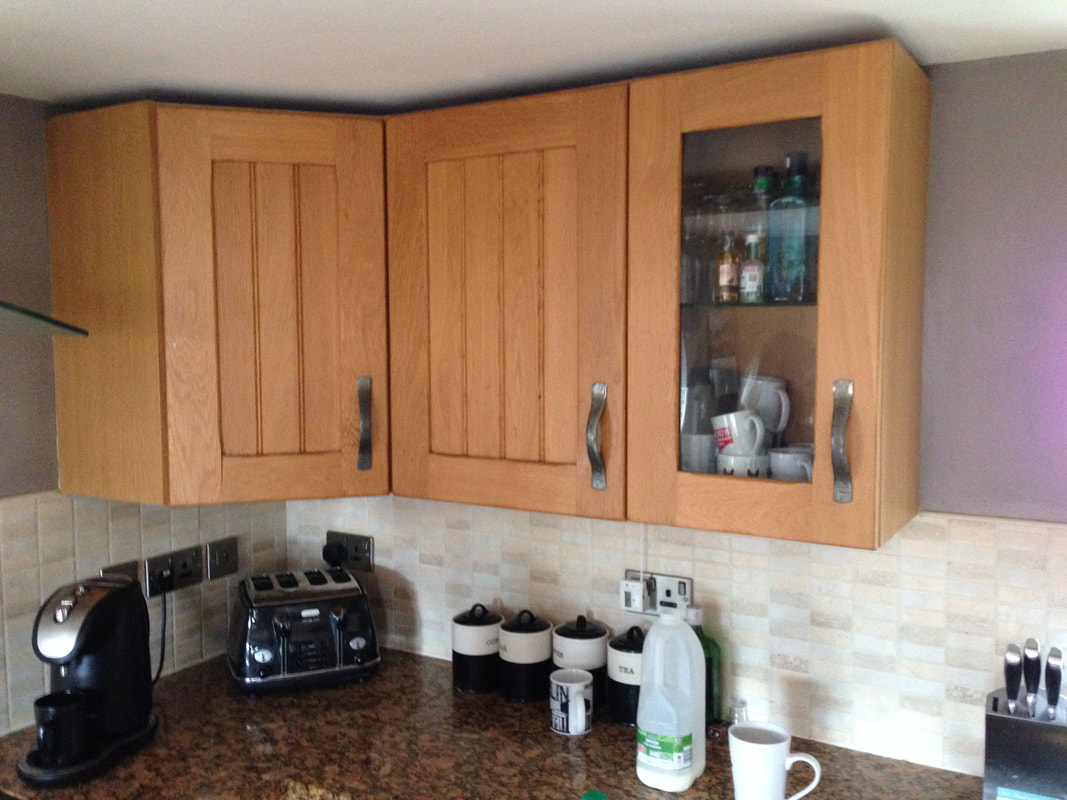
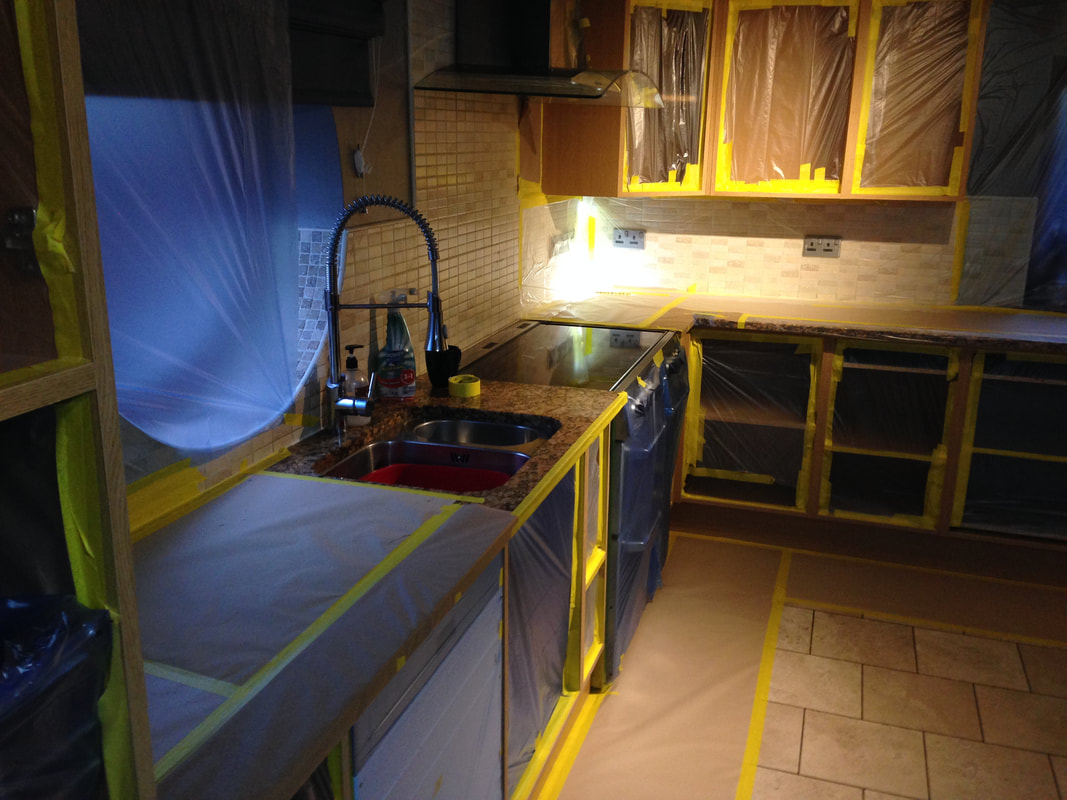
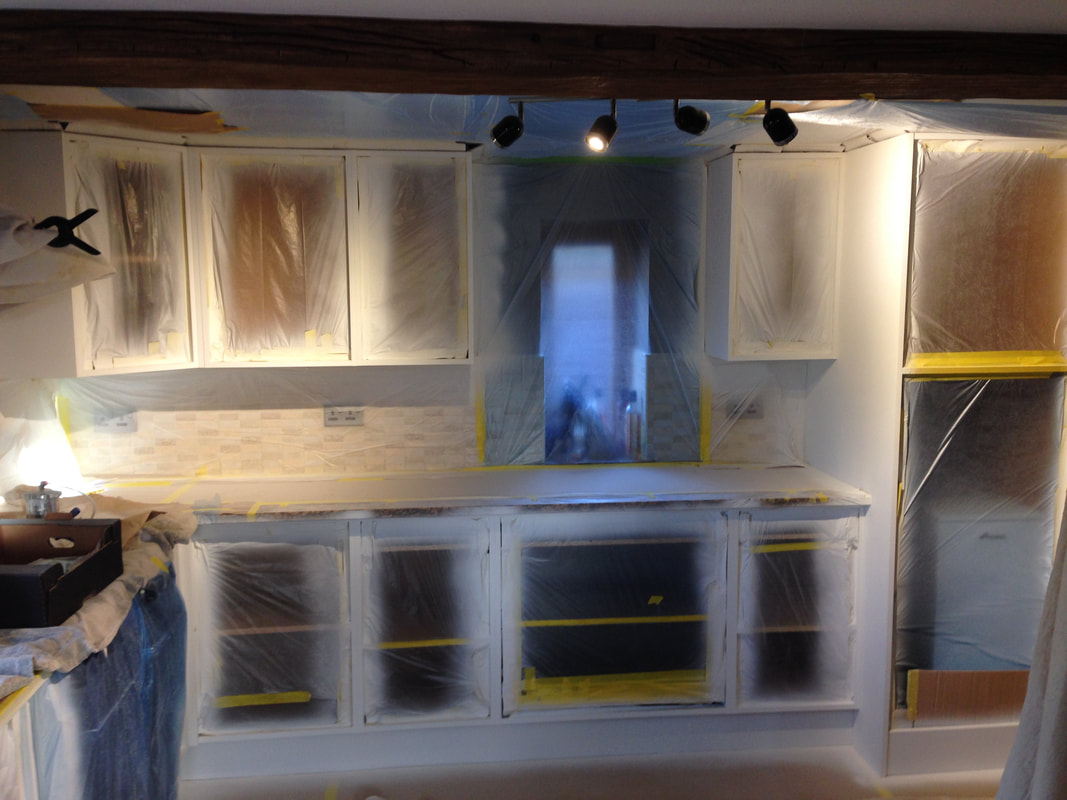
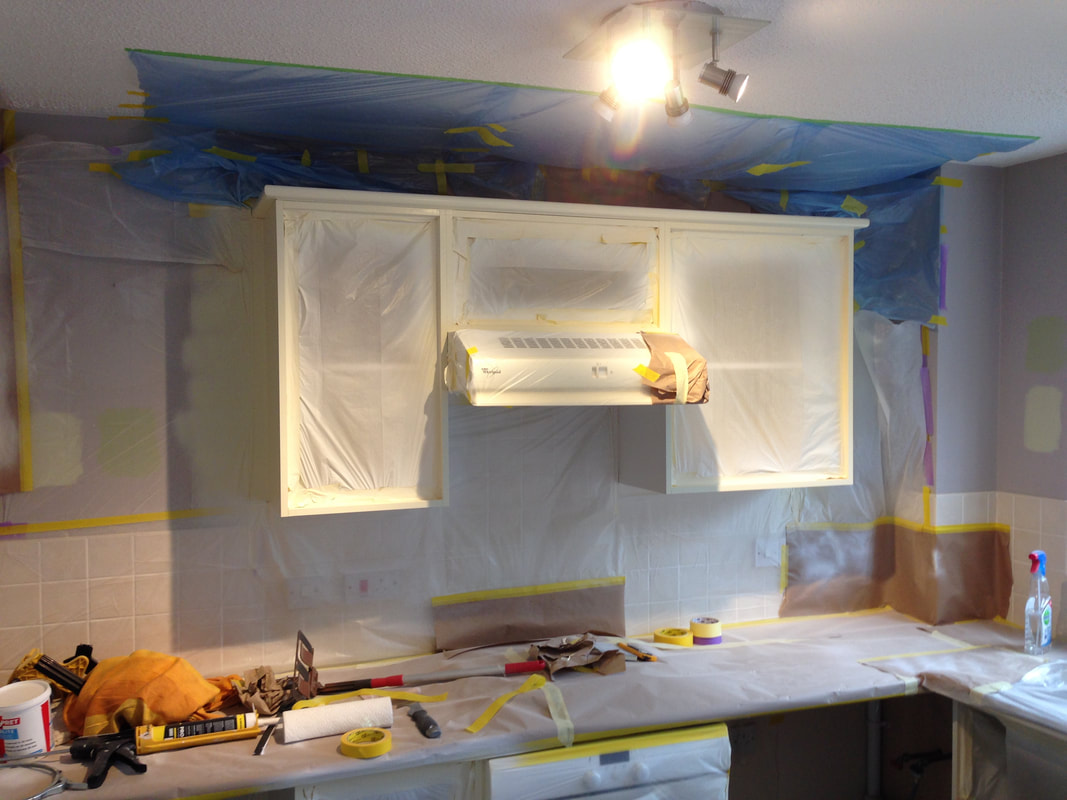
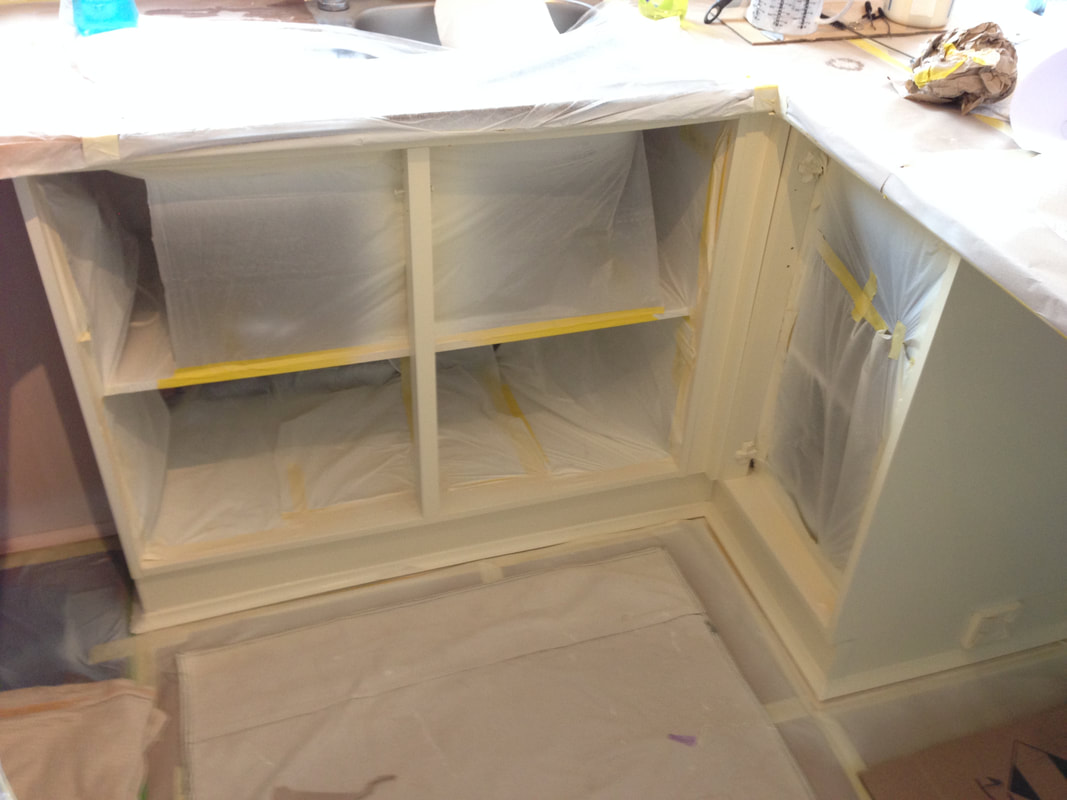
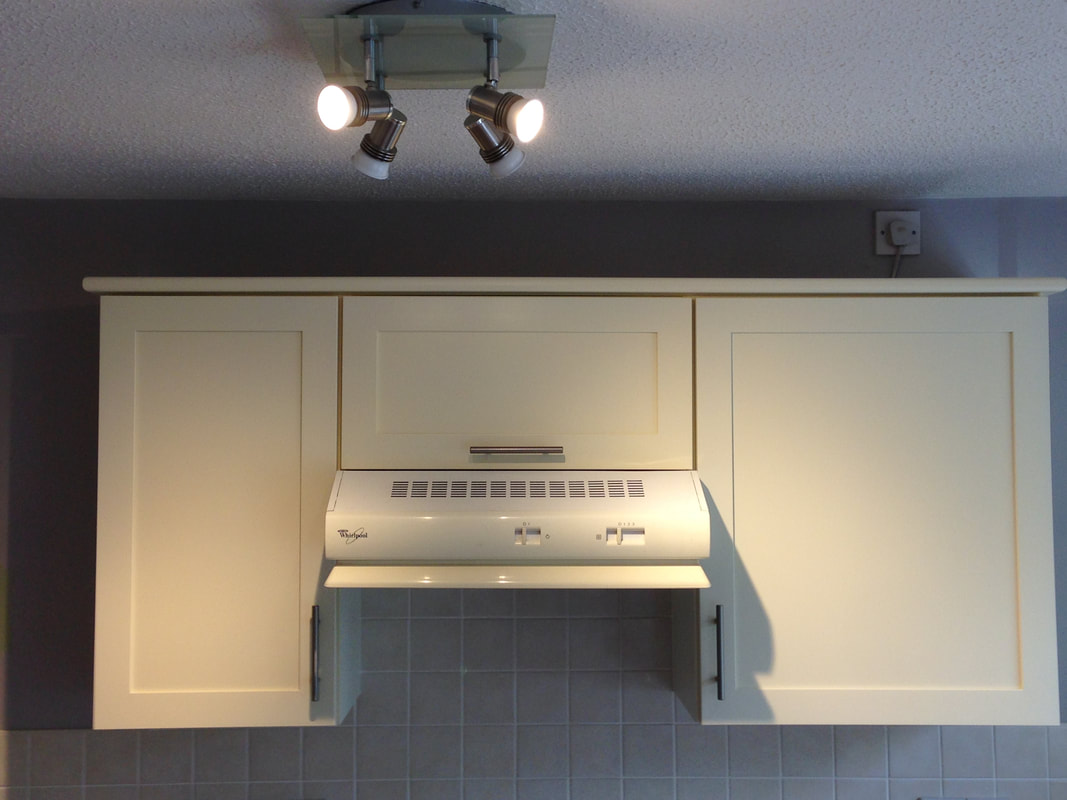
We wanted to share with you some pictures outlining the process of transforming a traditional oak kitchen into something our client had specifically requested from the offset. Replacing the entire kitchen would have been a very expensive option, so we were asked whether it would be possible to spray the kitchen and inject some new life and brightness into it - we of course said yes! Below is a gallery of some photos taken throughout the project, providing some before, during and after shots. 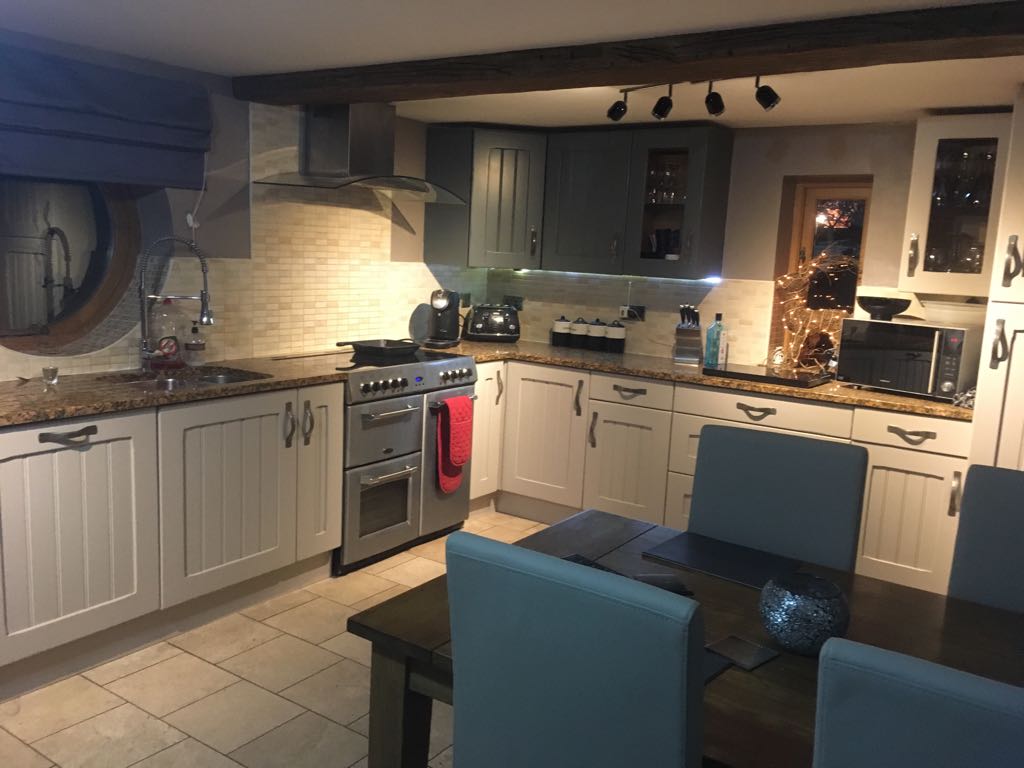 The project took a total of 3 weeks from start to finish. We had discussed timescales with our client and they were 100% on-board. They totally understood that in order for us to provide a long lasting and near factory finish, would take a lot of meticulous preparation consisting of many phases.
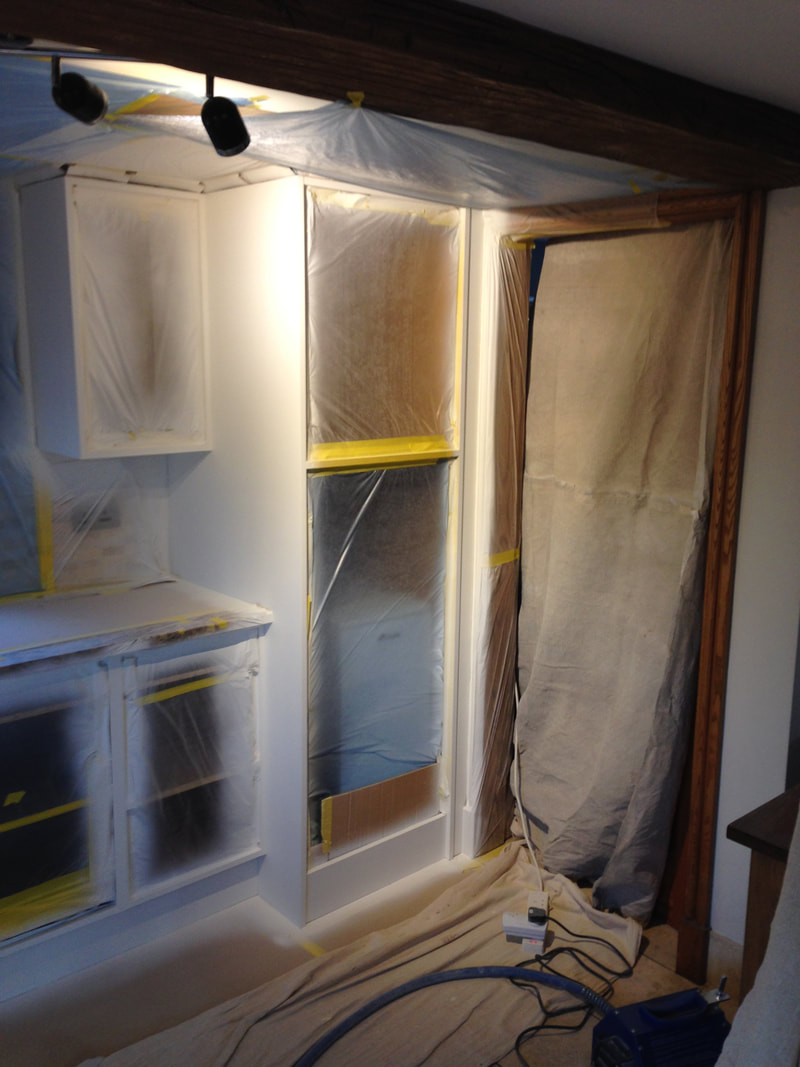
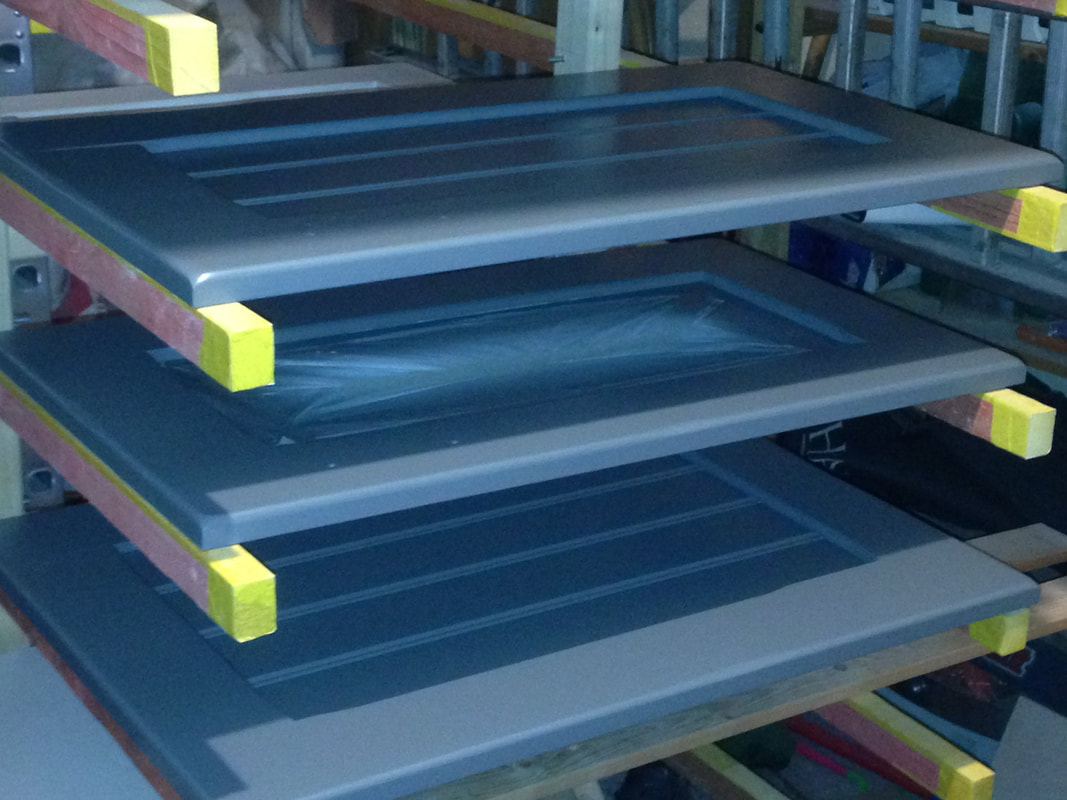
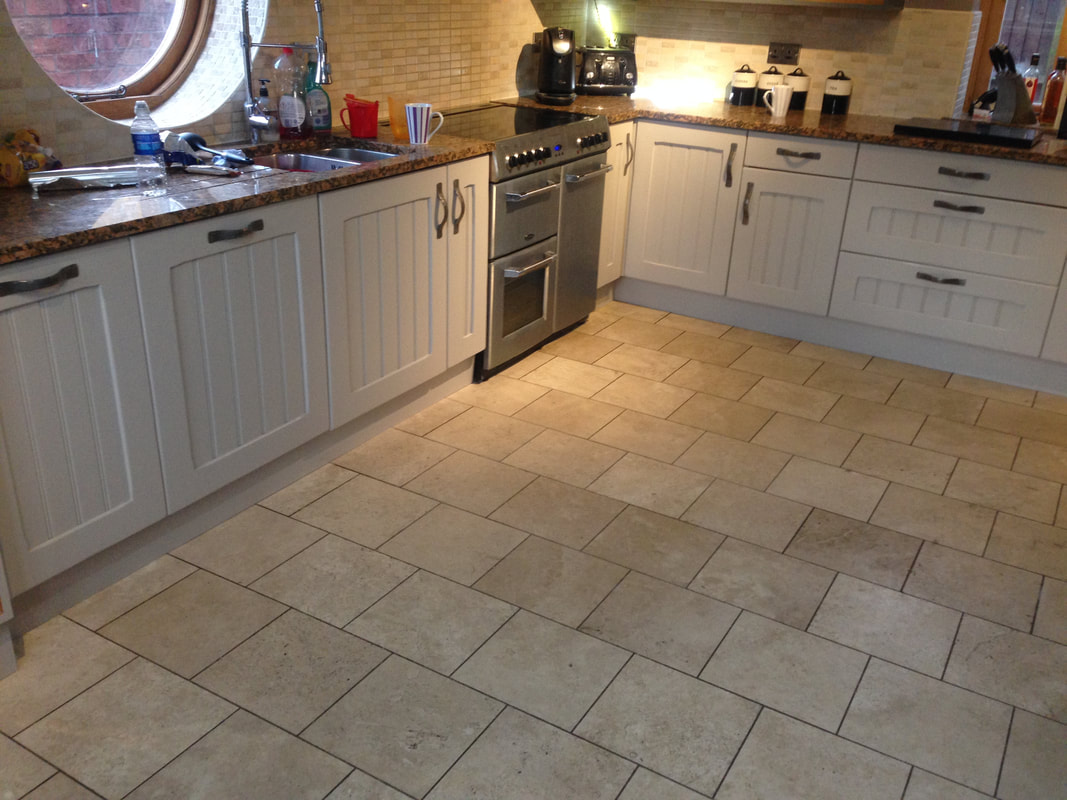
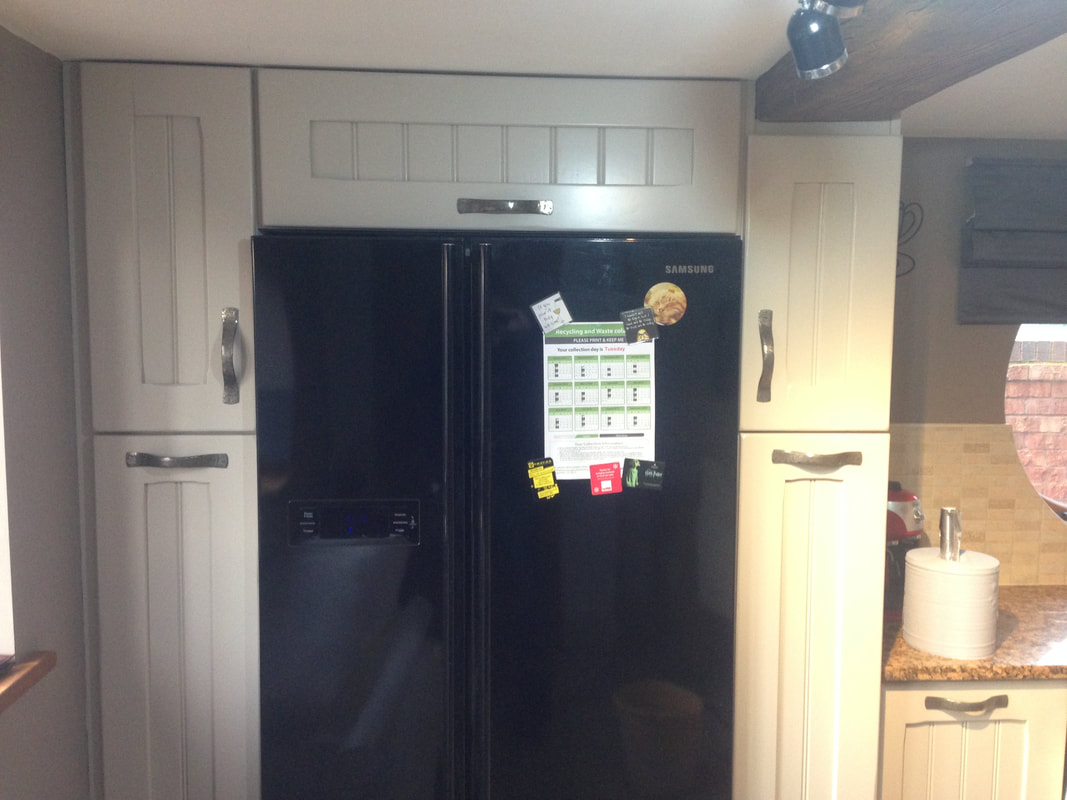
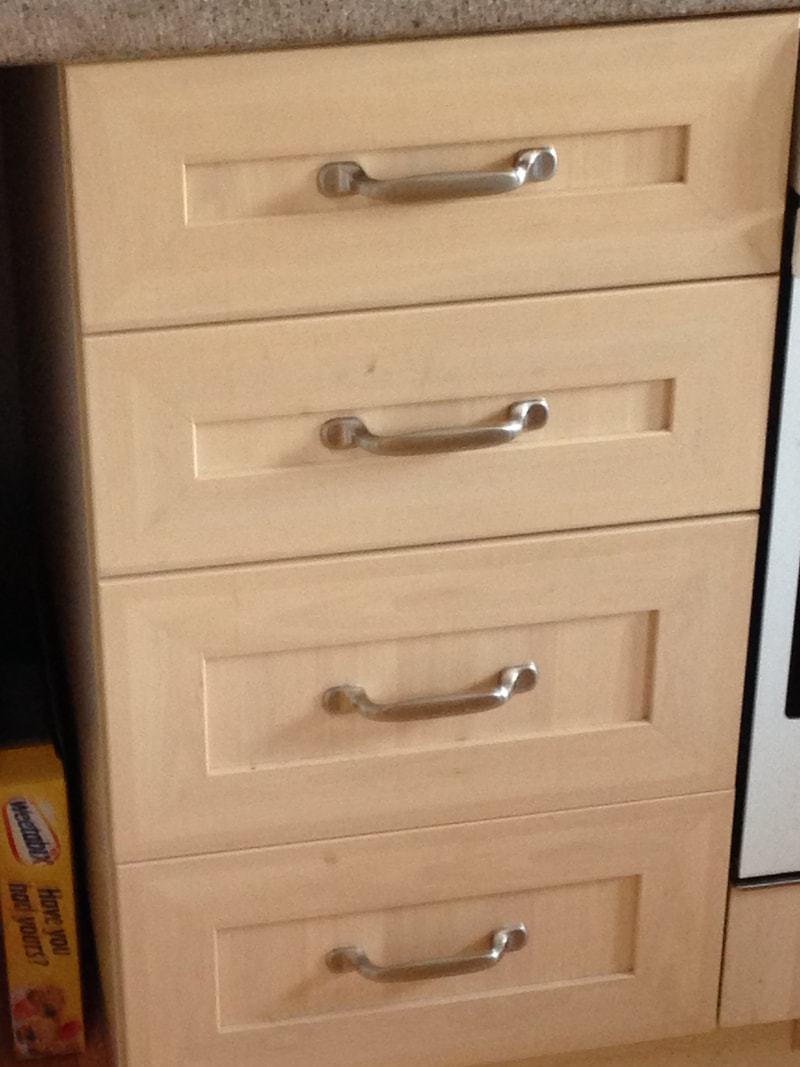
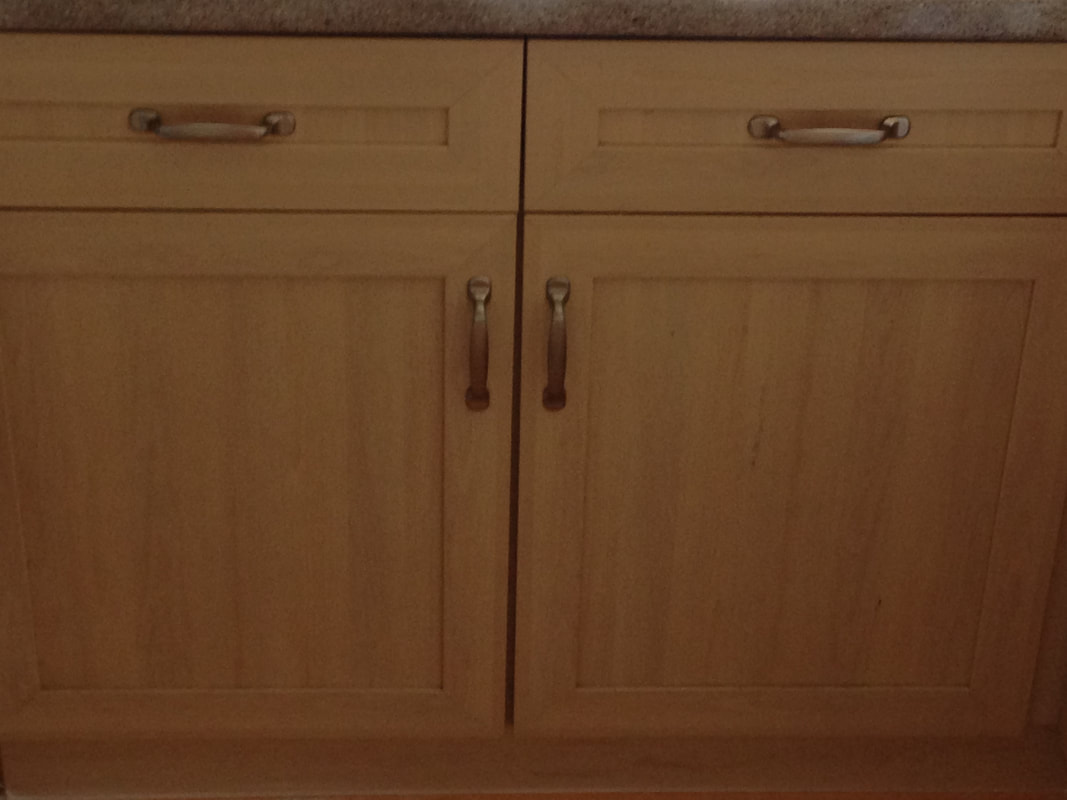
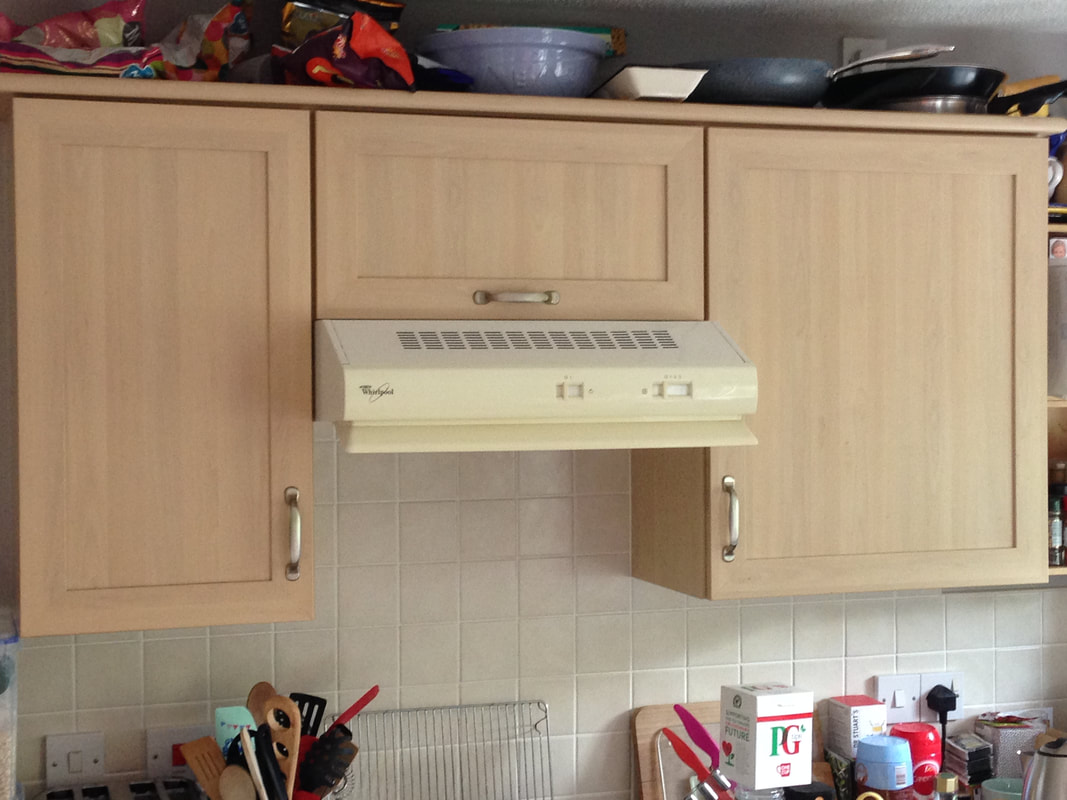
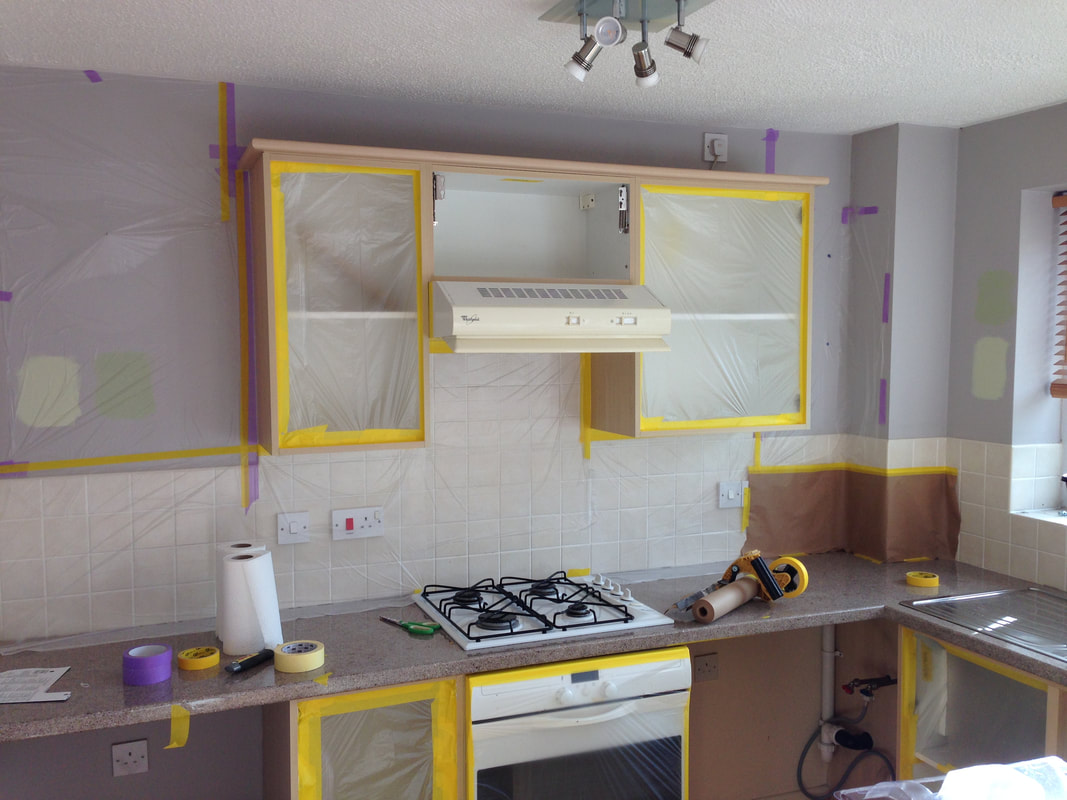
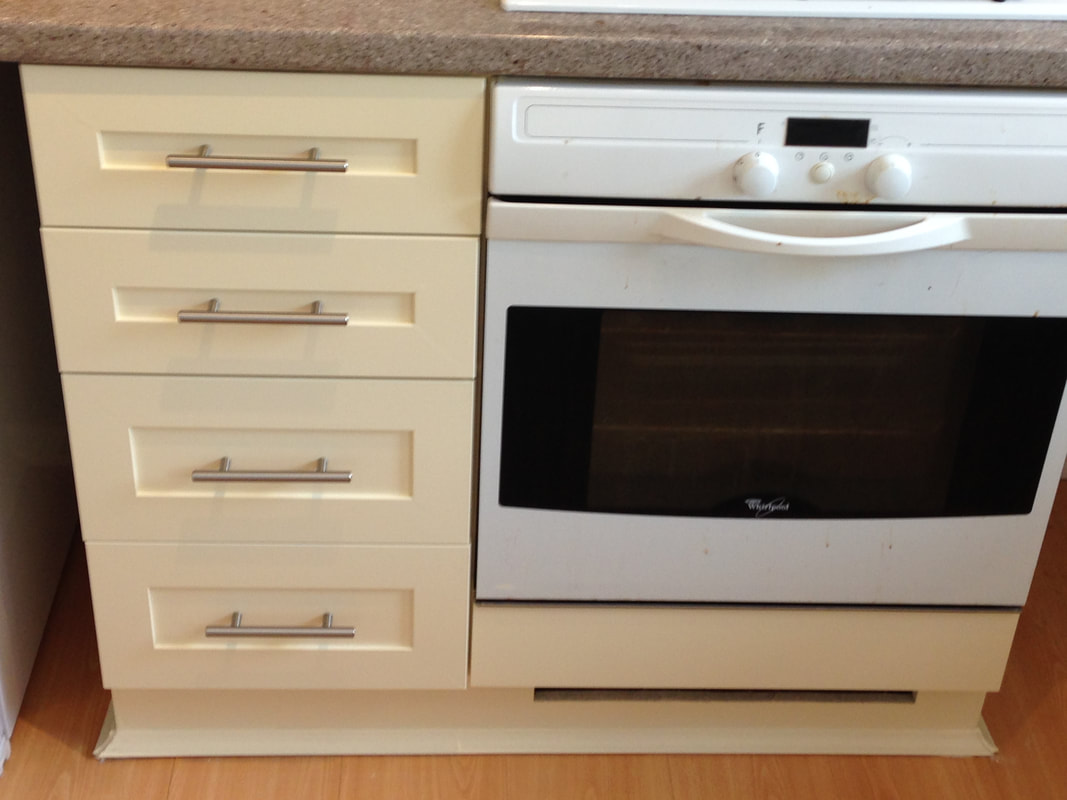
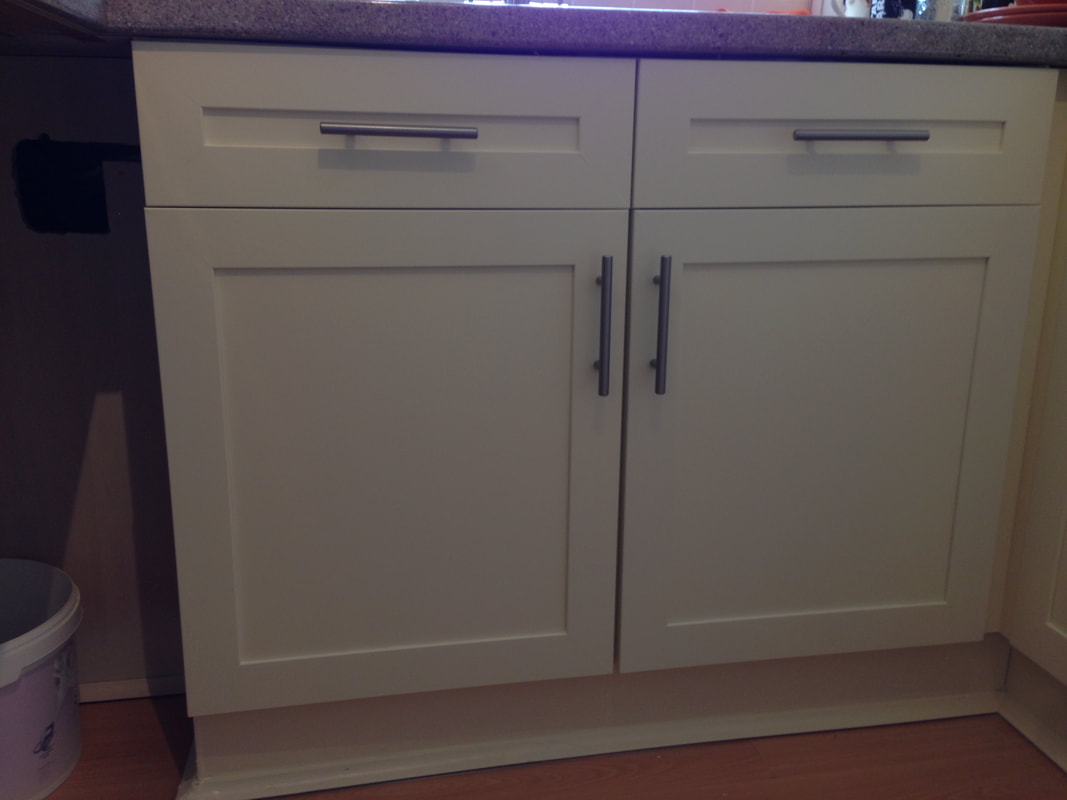
All of the cabinet doors and drawer fronts were removed and carefully labelled. The hardware components for each door / drawer were inserted into their own respective sealed bag, again clearly labelled, such that reassembly would be as straight forward as possible. The doors and drawers were taken off-site for the start of their transformation journey. Each door / drawer front was degreased thoroughly, as is a prerequisite for a high quality finish. They were further washed and rinsed to make sure that there was no residual grease left on the surfaces. They were then lightly abraded to provide a 'key' for the subsequent primer to adhere to. As these were oak units, we had to be mindful of the potential for tannin's to bleed through the top coats of lacquer and ruin the finish. We therefore chose a tannin inhibiting primer to prevent such an occurrence, followed by a high performance primer on top, before the top coats were applied. The tinted lacquer, which is hard wearing and perfectly suited for kitchen type environments, was then applied using our HVLP spray setup. The carcasses followed a similar process, albeit in-situ as these were not removable items. As the carcasses were not oak, we opted for a high adhesion primer in advance of the final top coats. Below is a picture of the completed kitchen:-
27 Comments
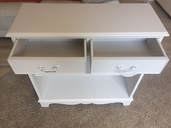
We were asked to transform this nearing 20 year old kitchen that the homeowners had lived with for 18 months and decided that enough was enough. They didn't want the normal prohibitive expenditure of a new kitchen, as the one they had was perfectly functional albeit, a little outdated and tired. With some consultation, their decision was to go for the Farrow and Ball 'House White' colour at 30% sheen level. New handles were also agreed upon and provided as part of the overall transformation.
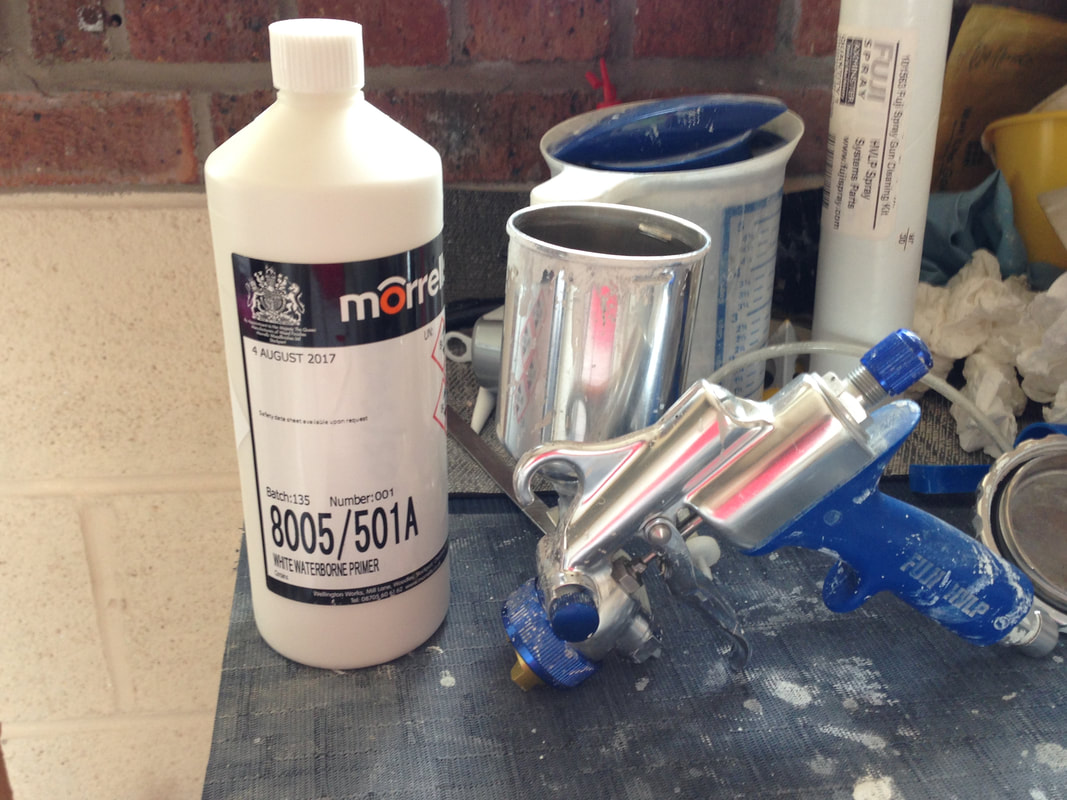
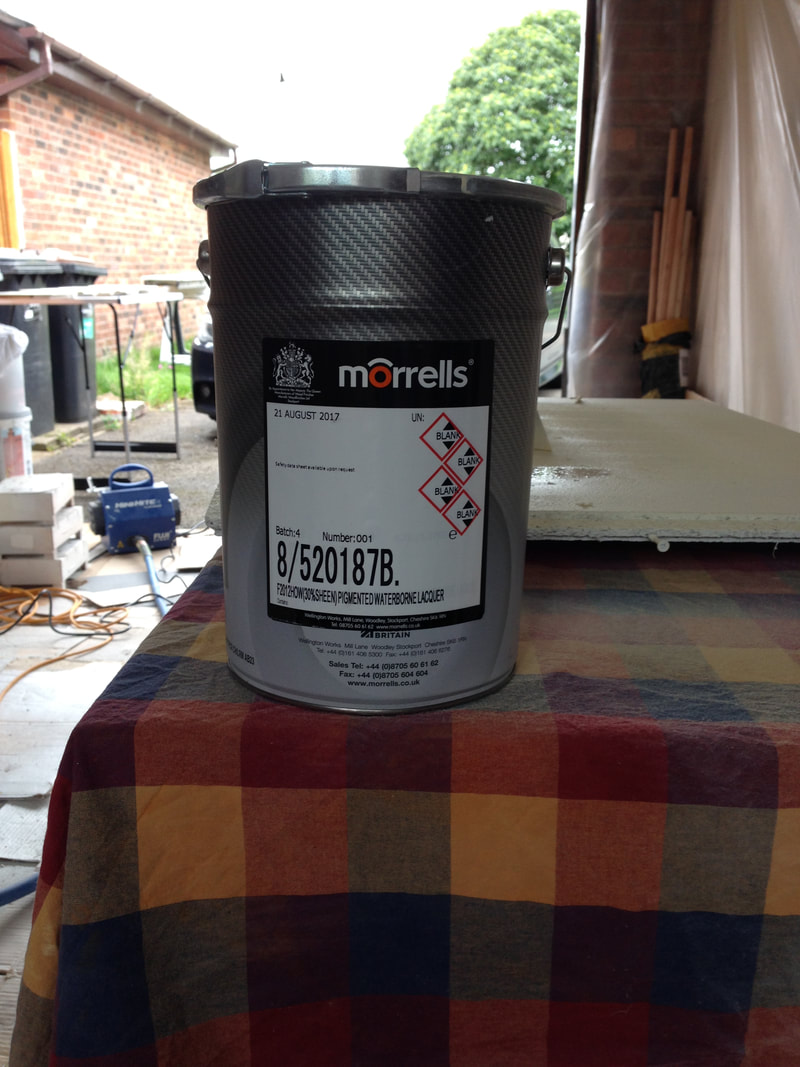
Drawer fronts and cabinet doors were removed and meticulously labelled, in order to maintain an audit trail and an easy method of making sure the original doors went back in the correct location, once sprayed. These were then taken away from the house and prepared and sprayed off-site, so as to minimise the disruption for the customers. Cabinet carcasses, plinths and the island were subsequently sprayed in-situ. Upon completion of the spraying, the kitchen was reassembled and new handles fitted to the doors and drawers. Above is a brief gallery showing the before, during and after photographs. The paint system used on this kitchen was provided by Morrells Wood Finishes. A Waterborne lacquer was used as this has little / no odour and therefore is ideal for in-house spraying. It is also certified to FIRA Standard 6250: 2005 and can be tinted to many colours and a variety of sheen levels. We have worked on a number of furniture spraying projects this year and thought it about time to share some of these with you. Each of the projects outlined before, were completed using the Tikkurila product range.
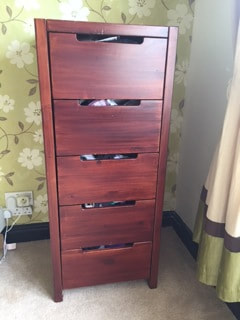
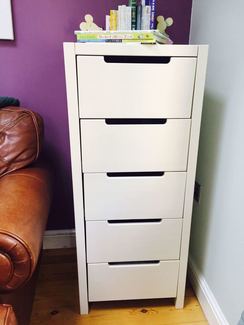
This project was for the client's baby that was imminently about to arrive. The dark stain that had been previously applied, was not appropriate for the new born and as such, we were asked to transform the unit by spraying with the Helmi 10 product tinted to the 'Tallow' colour. Before and after photos above.
Q1 masking tape is best known within the automotive industry and less well known outside of that sector. It is used extensively in body shops both in the UK and globally. As it happens, it also works particularly well in my world of spraying anything other than cars......... 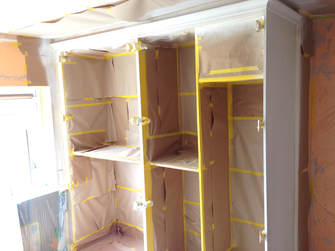 In this project, I was using a combination of the 24mm, 36mm and 48mm yellow masking tape alongside 450mm brown masking paper. The masking, in this instance was for two purposes - protecting the insides of the units from overspray and also to provide crisp sharp lines once the masking tape has been removed. The wardrobes were sprayed with two coats of primer, followed by two coats of top coat and both the paper and tape held up just as I was expecting. Removal of the tape, once the final top coat had been sprayed, revealed perfectly crisp and a well defined distinction between the surface that was supposed to be sprayed and the original internal surface of the wardrobes.  This was an external project and as you can see from the picture on the left, the yellow Q1 masking tape is in use again. This time, it is being used to protect the home owner's paving slabs and is being used again in combination with brown masking paper. This just goes to show how versatile this tape is. It is stuck to the actual paving slabs!  Here we have a completely different scenario again. This time, we are spraying the walls on this hall, stairs and landing. You will see that for this project, the yellow Q1 tape is being used, again with brown masking paper, to protect the ceilings from overspray. So, in the above, we have just three examples of how the Q1 yellow masking tape can be used in varying scenarios. I actually use it in many more ways in addition to the above. One final note, is to share something I learnt recently having visited the team at PPM Industries and this is that this organisation is by no means a one trick pony. They make a multitude of other masking and adhesive products for just about every industry conceivable. One other product that caught my attention is their Low Tack offering, which is marketed under the 'Lupo' brand and available from MyPaintbrush.co.uk. This should be useful when you need to mask recently painted / sprayed surfaces.
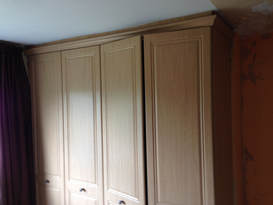 I was delighted to be contacted recently regarding the refresh of some built-in wardrobes. There was absolutely nothing wrong with the wardrobes themselves, other than the fact that, the room in which they were located was about to be decorated and these 10 year old wardrobes were not going to compliment the rest of the room. After a few e-mail exchanges and phone conversations, the project and scope of work was agreed and the dates were set. The requirements were to transform these foil wrapped wardrobes by spraying them in Worsted, a rich mid grey colour that would really blend in very well with the new decor. 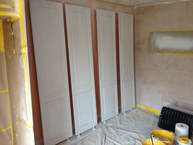 The doors were removed and individually washed and de-greased, followed by a thorough rinse with clean water. Thereafter, each door was very lightly abraded with a 220 grit sanding sponge, as this would provide a key for the subsequent primer coats to adhere to. As this furniture was all 'foil wrapped', it was essential to use a high adhesion primer. Two coats of Otex Akva (from Tikkurila) were applied with my Wagner Project Pro 117 airless sprayer, fitted with Graco Fine Finish Low Pressure (FFLP) spray tips. Once the primer was dry (left overnight), two coats of Helmi 30 tinted to the 'Worsted' colour were sprayed, to provide a near factory finish. 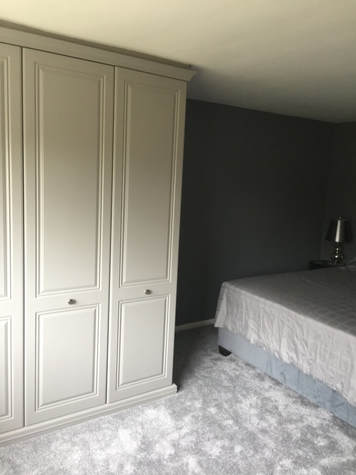 I was looking for a solution for protecting stair carpets within premises about to be sprayed. Normal dust sheets are available in a long and narrow format, specifically for this purpose, but they offer very little grip and almost invite you to trip up as you navigate the stairway, with spray gun in-hand. Then I came across the 'Step by Step' product from GripperCloth, which were totally unique and the likes of which I had not seen before. 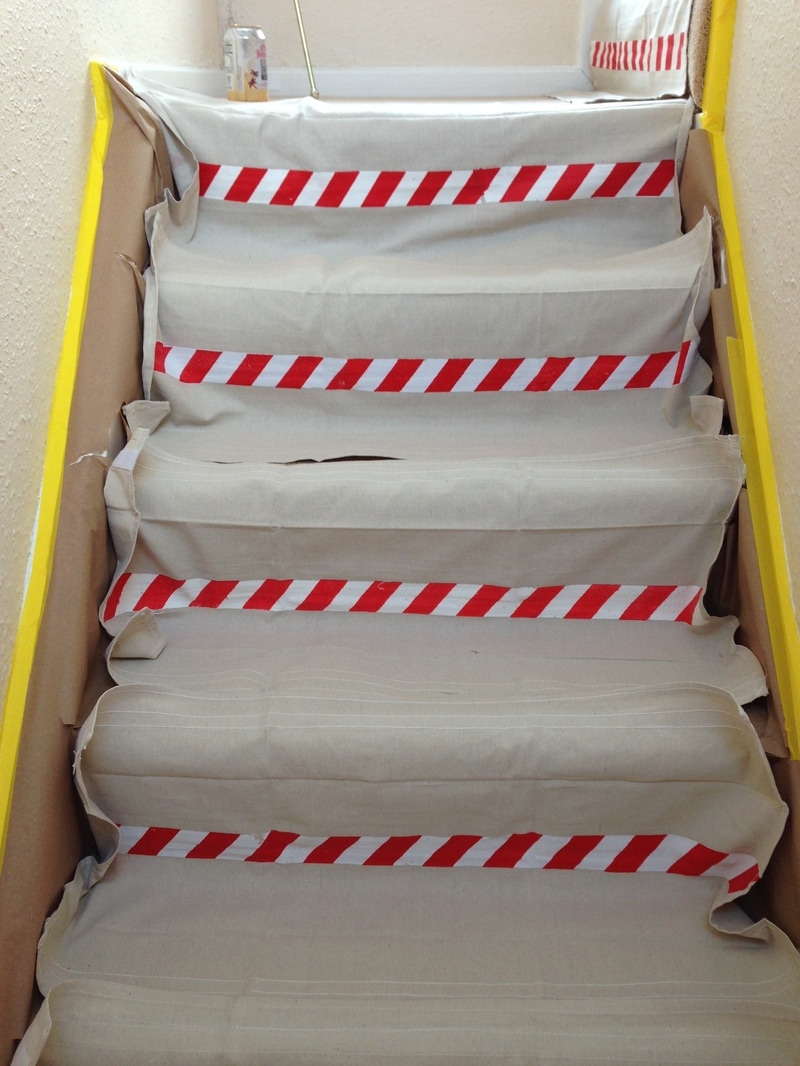 The 'Step by Step' product comes as a set of 14 individual sheets that have velcro on them to help them attach to the existing carpet. It just so happens that there appears to be 14 steps on an typical household staircase! You lay each sheet over an individual step and almost 'link' them together to provide a very secure footing and super protection.
I used these alongside other masking techniques to protect the stairs in a recent project that involved spraying the walls of a bedroom, landing and of course stairs in a flat in Nantwich. In addition to the 'Step by Step' product, I also used the extra strong dust sheets from GripperCloth and found all of their products to be excellent. I already knew that HVLP and airless spraying were different to each other. With my airless sprayer, you have to select the correct tip size for the job in hand and typically do not need to 'thin' or 'reduce' the material being sprayed in any way at all. With HVLP, you have needles and air cap combinations, instead of tips and tip guards. That in itself is simple enough, once you get your head around it and understand which needle size goes with which type of product you are spraying.
What was somewhat new to me with HVLP, was the concept of thinning the product to be sprayed. I had read on many forums that adding 10% water (to a water-based product), was the way to go. Without further a do, I jumped in with the 10% dilution theory and had somewhat less that impressive results! With my HVLP setup came a viscosity cup, which I had also read up on, but had not used. Back to basics me thought and I resorted to timing my product through the cup for the first time. The 'suggested' time for the material to pass through the cup was in the 40 second region. On the first pass, the material took over 3 minutes (that's more than 180 seconds), which was way too viscous / thick - no wonder I had problems with the initial run. Adding 10% water (as suggested elsewhere), the time through the cup was reduced to about 2 minutes, so it was heading in the right direction, but nowhere near enough. Elsewhere, I had read that temperature had quite an influence on the viscosity of the paint and as I didn't want to go mad with adding too much water, I decided to run a bowl of hot water from the tap and stood a container of undiluted paint (measured so as to keep an eye on the %'s correctly) in said hot water. I stirred the paint in it's container, stood in the hot water for about 5 minutes. I then re-timed the paint through the viscosity cup. The increase in temperature had a similar, if not slightly greater, influence on the paint, compared to the water. It now went through in less that 2 minutes (remember, this had no dilution at this point!). Still somewhat off of the target 40(ish) seconds, I now began to add 10% water and then added more water in 5% increments. After what seemed an age (about 20 minutes!), I had the paint running through the cup in 40 (or thereabouts) seconds - this was good enough for me. 15% with one product and 20% with another product - the 10% rule has not worked for me thus far. What a difference this made. I was AMAZED at how much better the same product now came out of the spray gun and how much better it was laying out on the target surface. Hey presto, I think I have sussed it! I will be making note of the timings for each product alongside the % dilution as I go along. I can see the viscosity cup and I are going to be friends for a while to come until such times I have this nailed instinctively. |
AuthorDave King - passionate about all things spray related. Archives
January 2018
Categories
|


 RSS Feed
